Select File->New->Java Project to create a new project space for Shale. Type in 'Shale' as your project name. If you placed the Shale project folder somewhere besides your Eclipse workspace:
Select 'Create project from existing source' radio button, and click the 'Browse' button
when it allows you to to open up a Browse for Folder dialog box - navigate to the location where you
unzipped Shale.zip and select OK.
Select 'Finish' and the project folder will be ready for you in Eclipse.
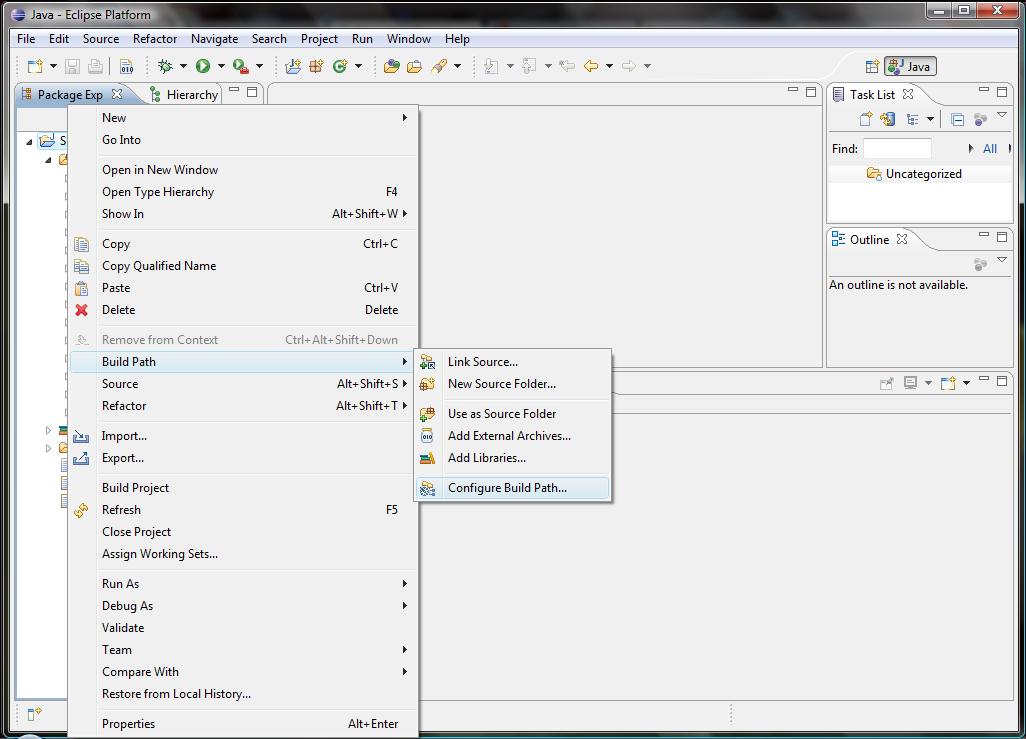
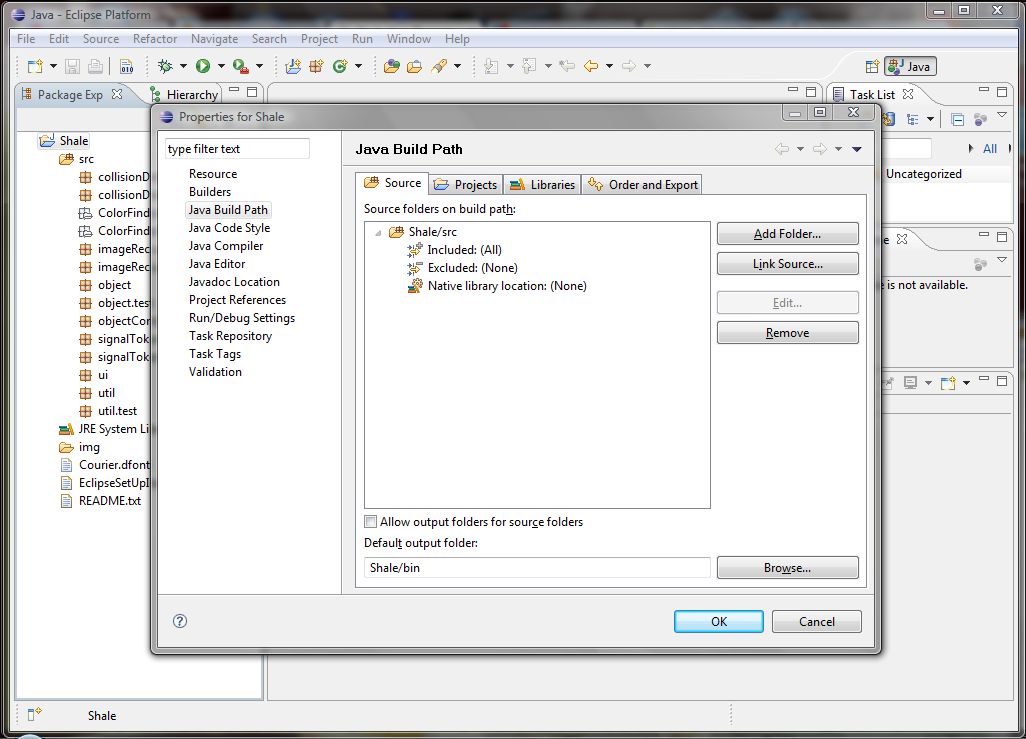
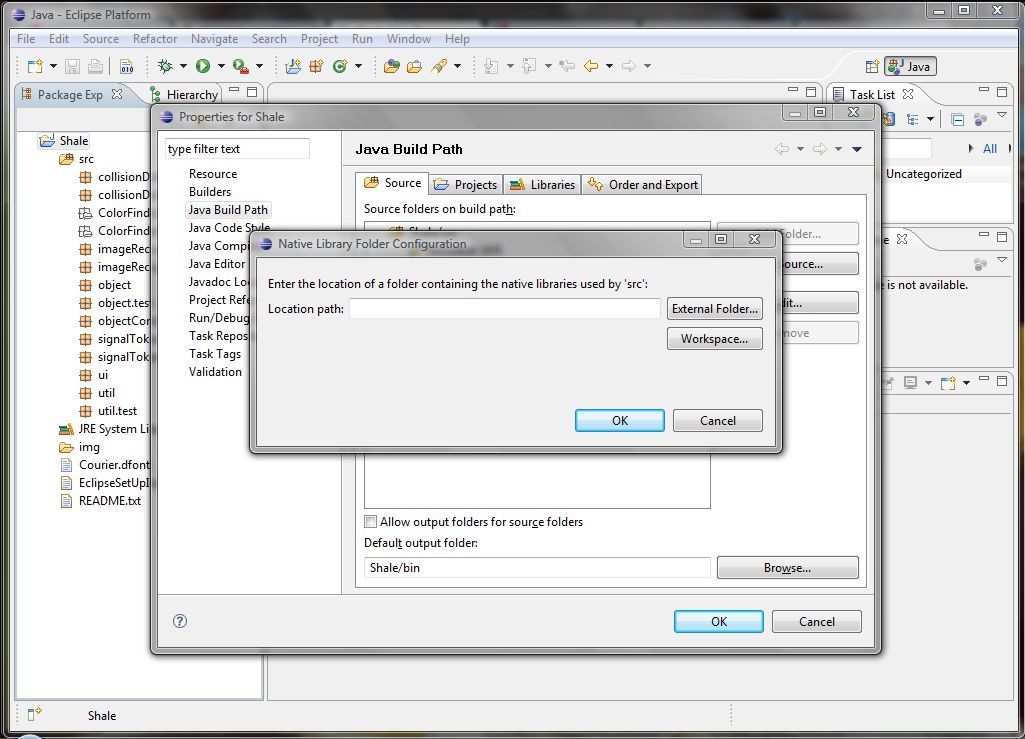
Under the Source tab, select 'Shale/src' and then select the 'Native library location' property.
Click on the 'Edit...' button to the right of the 'Shale/src' property window. This will open up a Native Library Folder Configuration dialog box, where you select the location path of the 'lib' directory downloaded earlier. It should be in the same path as that of your Workspace, but you can also select External Folder of you remember the path.
Once you have selected the location of the 'lib' directory, click OK to return to the Properties for Shale options box.
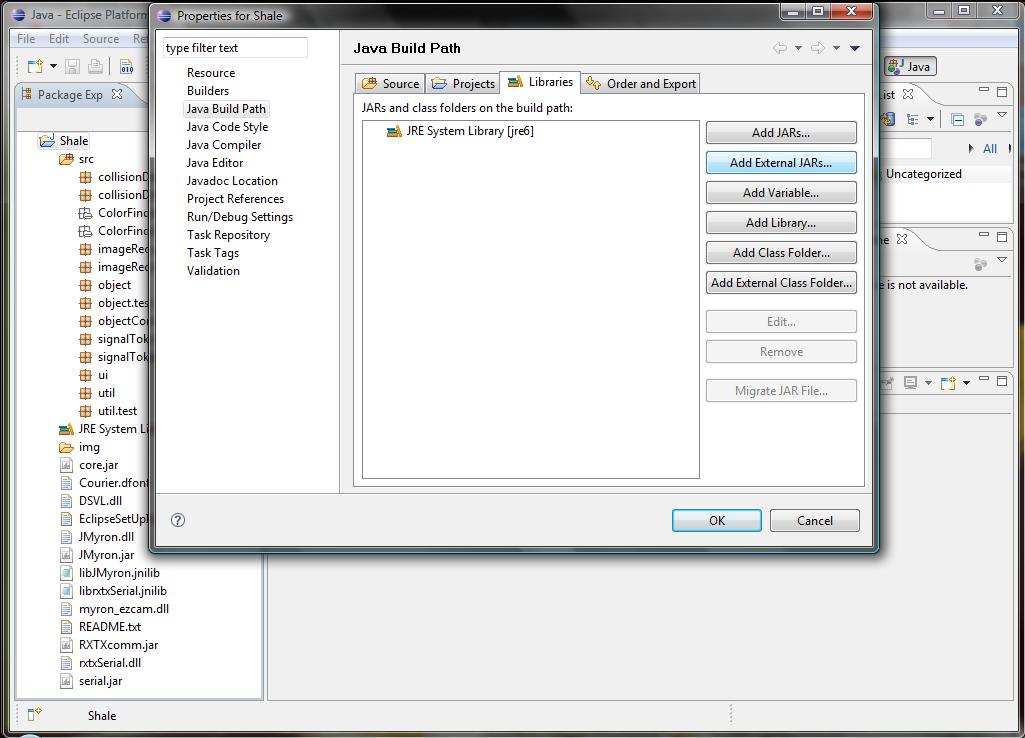
Under the Libraries tab, select the 'Add External JARs...' button, and navigate the JAR Selection dialog box to the location of the 'lib' directory, and select the following .jar files:
core.jar
JMyron.jar
RXTXcomm.jar
serial.jar
Click OK. This will will add these external .jar files to your build path.
For each of the following .jar files:
core.jar
JMyron.jar
RXTXcomm.jar
serial.jar
In the 'JARs and class folders on the build path' window, select the .jar file and then select the
'Native library location' property. Repeat step 3.c for the .jar file, making sure the location path
is directed towards the 'lib' directory. Select OK to return to the Properties for Shale options box.
Deselect the 'Native library location' property - this will allow you to select the 'Add Library...'
button - do this, and the Add Library dialog box will appear. Select JUnit from the options shown,
and select Next. Make sure JUnit3 is selected as the library version, and click Finish. This will add
the JUnit 3 library to your Shale project build path.
Click OK to close the Properties of Shale options box.
Set up the Shale run configurations.
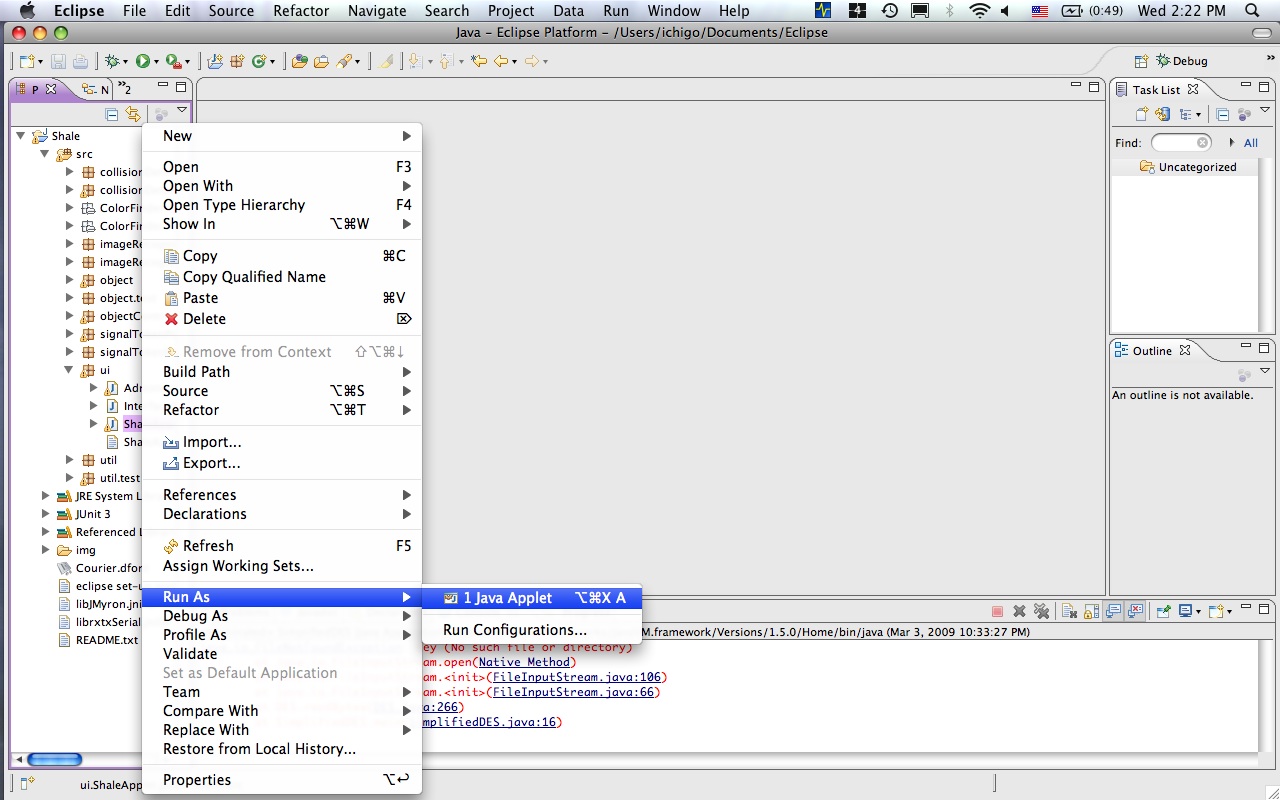
In the Package Explorer, select Shale, and navigate to the ShaleApplet.java file. Right-click on it,
and select 'Run As->Run Configurations...' - this will open a Run Configurations options box.
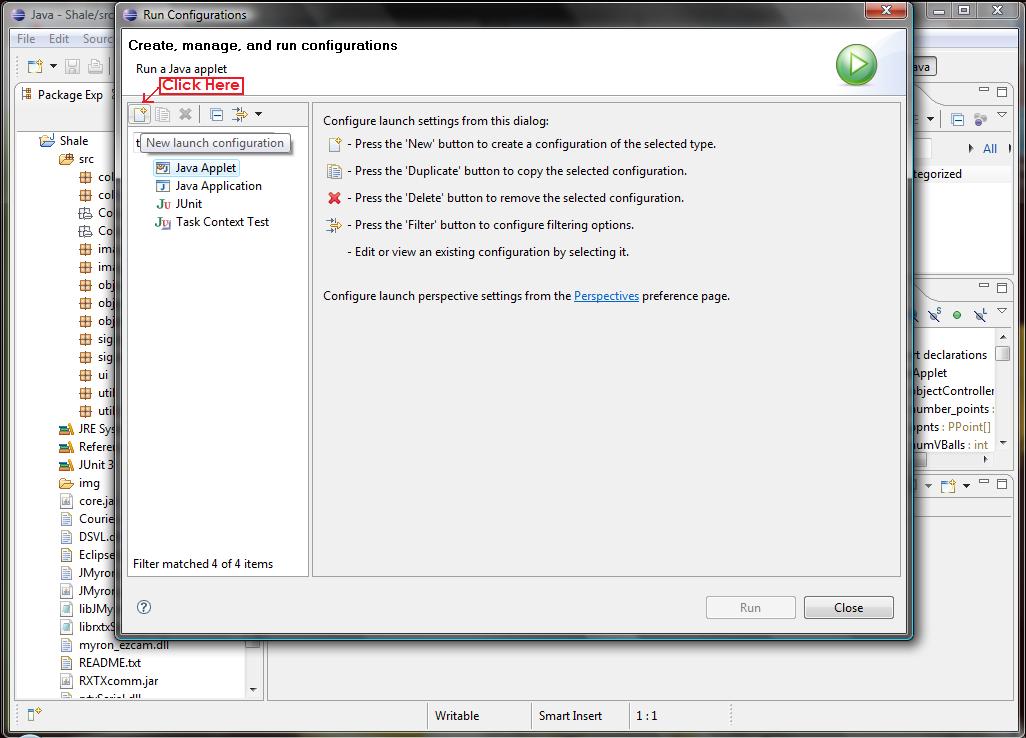
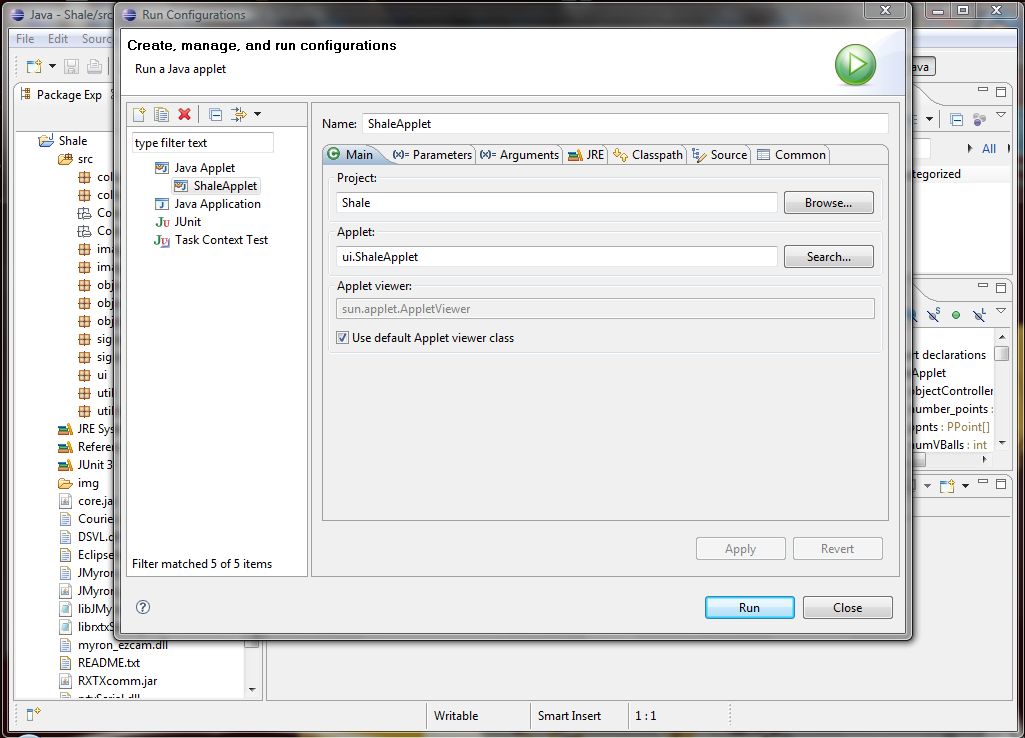
On the left-hand side, select the Java Applet configuration. Above and slightly to the left, there is
a 'New launch configuration' icon. Click on it to create a new configuration for Shale.
Rename it from 'New_configuration' to ShaleApplet or something like it that you recognize easily. In
the main tab, select the 'Search...' button beside the Applet section under the Main tab. Choose
'ShaleApplet - ui' and click OK. It should look like this.
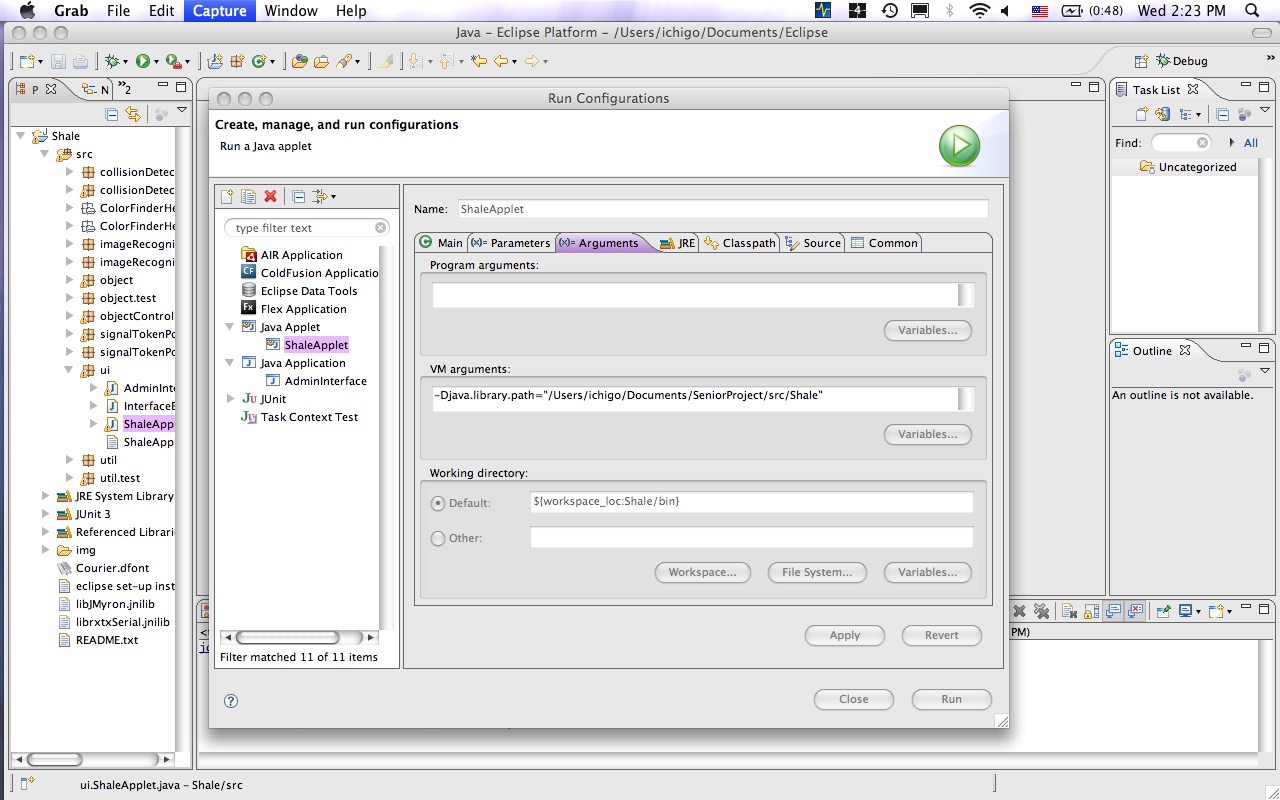
Under the Arguments tab, select the VM Arguments box, and type:
'-Djava.library.path="pathToJMyronLibrary"', where pathToJMyronLibrary is the direct path to the 'lib'
directory mentioned earlier.
Select Close, and this will close the Run Configurations option box.
Build the project.
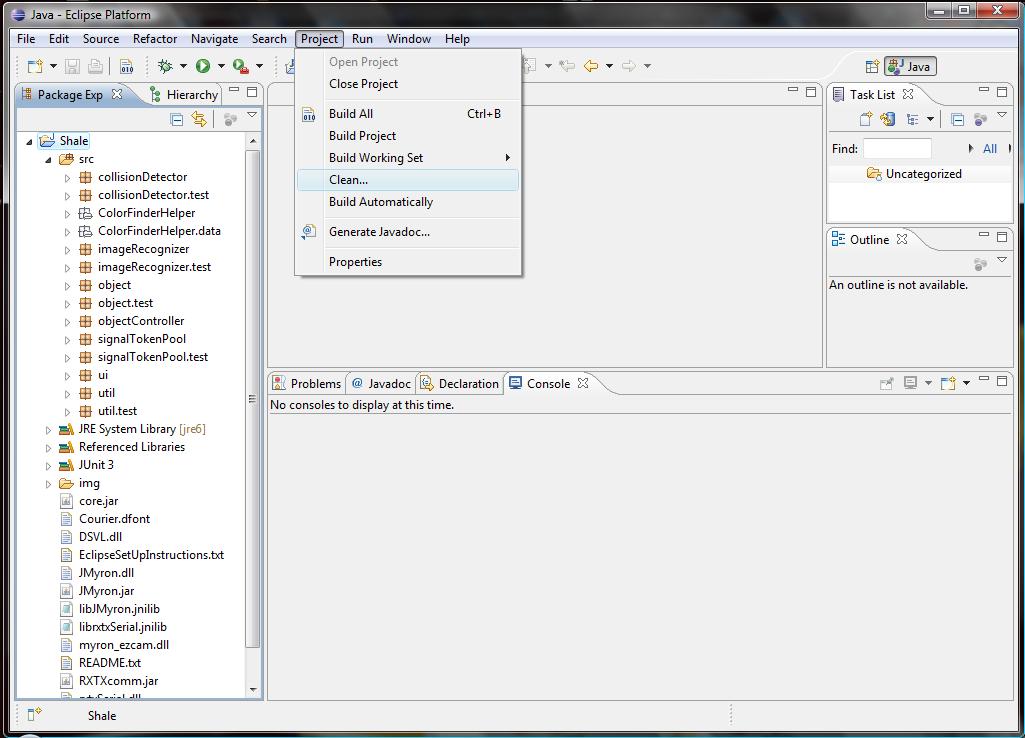
Select Project->Clean... from the Eclipse menu, which opens a Clean options box. At this stage you can
either clean all your projects. or choose to clean just the Shale project. Either way, make sure the
'Start a build immediately' checkbox is deselected. Click OK, and the Shale project will be cleaned.
Select Project->Build Project from the Eclipse menu to re-build the Shale project.
To run Shale, right-click the ShaleApplet.java file and select Run As->Run Configurations... and run
the ShaleApplet configuration.
Once you have finished setting up the project, you can now calibrate the system to run properly.